|
I went into this project with little knowledge of the process behind creating a projection mapping. When reading through the brief and discussing the theme with both my peers and tutors I got inspiration for some possible ideas to explore. From there I was able to create some storyboards and develop them. I liked presenting to the client throughout the course of this brief and found it a helpful experience as it is something I had never done before.
In terms of the final animation I made, I am pleased with the way that it turned out. I chose the style that I did because I thought it is the most fitting for the brief and it reminded me of the children's christmas books that I used to read when I was younger. Looking back at the process I think it benefited me as a designer because I was able to put my aftereffects skills into practice as well as allowing me to develop them further. Throughout this project I have worked on my animation and learnt how to present an idea to a client. This will all help me in future projects. However after seeing the projection playing I would have liked to have been able to add some more defining movement to the characters, as I noticed it was not as clear in the projection as it was on my laptop screen.
0 Comments
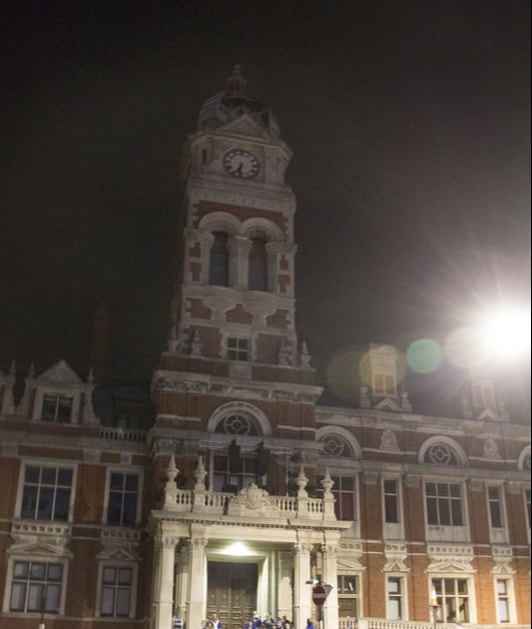
It was nice to be able to go and see my work in the intended setting and to see how people reacted to it. I really enjoyed my time spent working on this project and seeing it develop from the initial ideas to the finished animation. I was interested to see how all of the different animation techniques used for each section would work together and I think they all tied in nicely. I started off the day by adding the finishing touches to my animation and ensuring that all of the timings worked well together. The next step was to render out my video. Once I had done this I needed to add in the transitions form my scene to the next person's scene. I then rendered out the transitions, ready to be used.
My goal for day two was to animate my characters so that when they were seen moving through space it brought them to life. I began by brainstorming all of the possible ways I could get each character to move. Once I had done this I went into after effects and added pins to each joint and the main body of my characters. This enabled me to use the puppet tool to keyframe where I wanted the character to move to. One of the main issues that I encountered was that some of the movements looked unnatural because I was using a 2D image. To get around this I had to go back and add in more pins to increase the accuracy of the movement. Despite having never used this method of animation before, I found it relatively easy to get my head around. It is definatly something that I will take forward and use in future projects.
The next thing that I had to do was keyframe the characters into the sequence so that it looked like they were moving through space and into the portal. I found getting the timings right a bit challenging because I had to ensure that the movement of the characters could be seen but also that the scene did not drag on for too long.
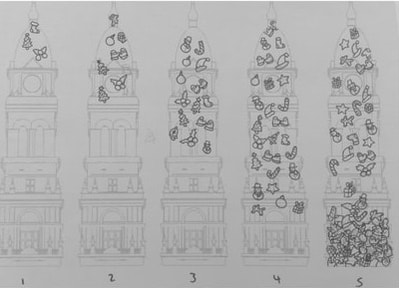
I spent my first morning at West End Studios, illustrating my characters, which I then scanned in and traced in Illustrator. I also drew some space related assets that would be more focused on than the assets I had already drawn (done by key framing them instead of adding them to the particle system), to bring attention to the fact that the characters were in space.          I also learnt how to create a particle system in after effects, adding my assets to make them seem as if they were coming towards the camera. The results of which are shown below.
I began putting my drawings into after effects. The part of the storyboard that I decided to mock up was the portal opening and some toys falling out. As I don’t have very much experience using aster effects I did this by key-framing them. I also added a wiggle to the images to make it look like they were in space and not just sitting on the building. The feedback that I received was to look in to adding particles as a way to bring my idea to life in the most effective way. This is something that I had never heard of before, so was unsure as to how difficult it would be.
After getting feedback from David (the client), I began developing my idea, I began by drawing my assets, shown below, I scanned them in and traced them in illustrator, adding colour. Which I then used for my short animation to present when David came back in.      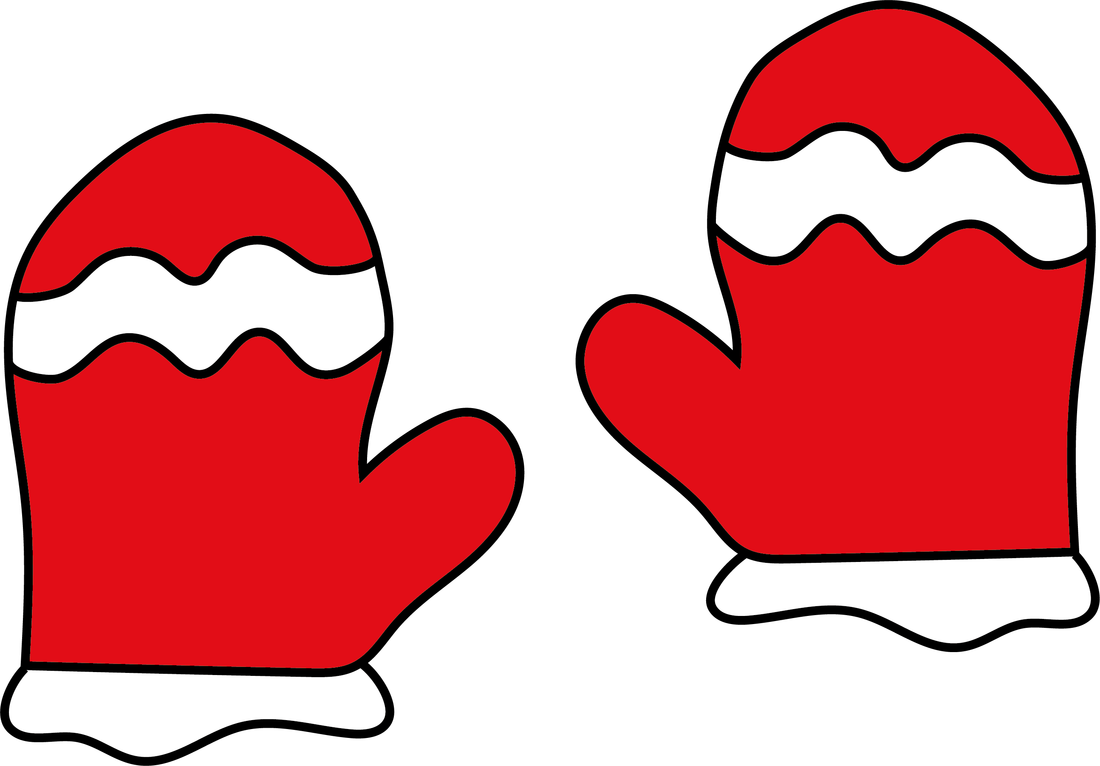        I also wanted to develop my storyboard further, and came up with three different variations.
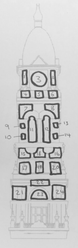
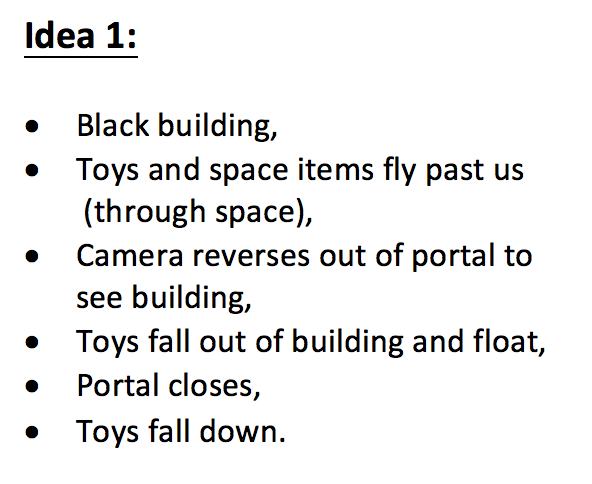
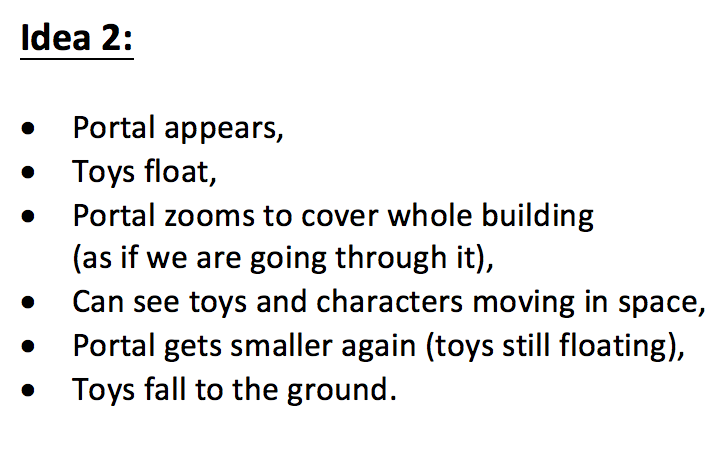
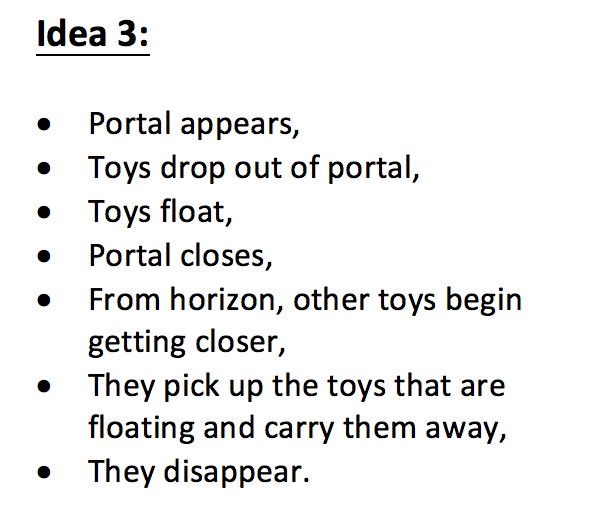
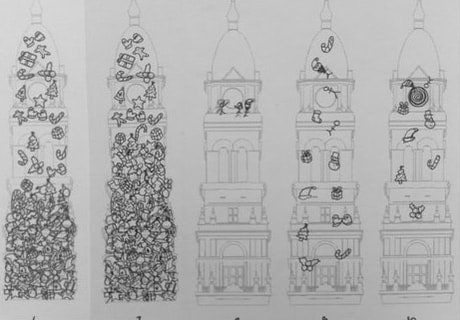
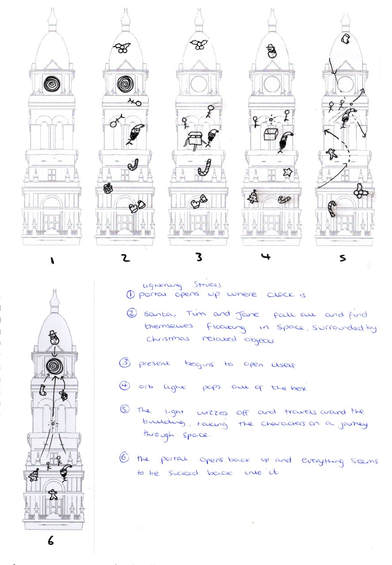
When looking through the various storyboards that I had made, I thought about what would look the best when projected onto the Town hall. By doing this I was able to narrow down my selection to two ideas, which I then transferred onto the image of the building provided to us, to show the idea better. Below are those Storyboards.
When presenting my idea I explained my storyboard and asked which of the two he preferred. The one that was chosen was the one in which particles fall out of the clock and the characters appear to float through space.
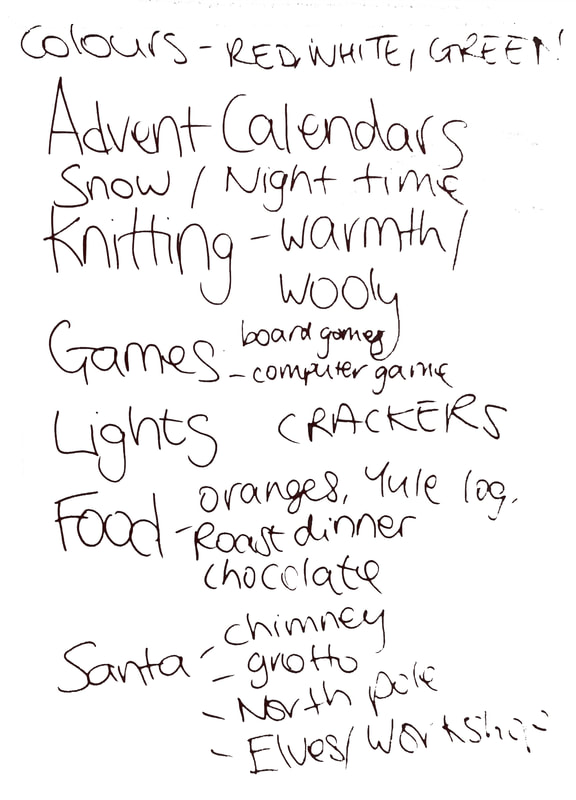
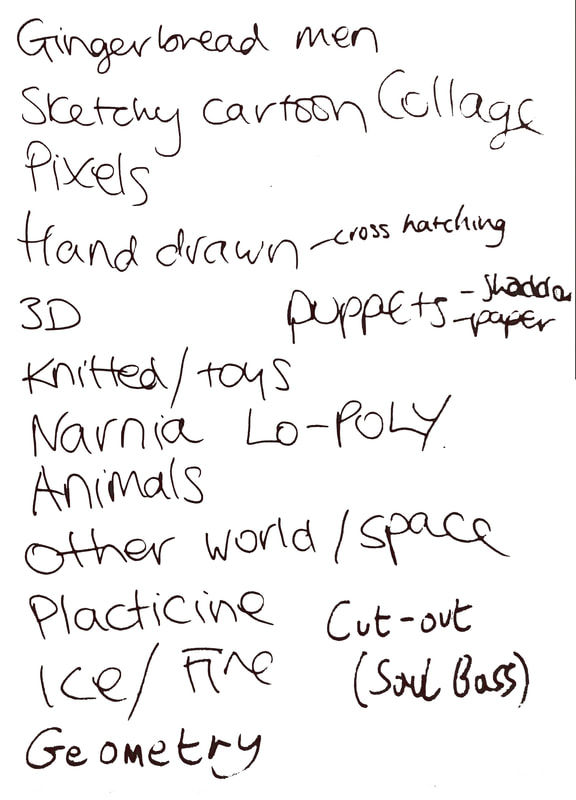
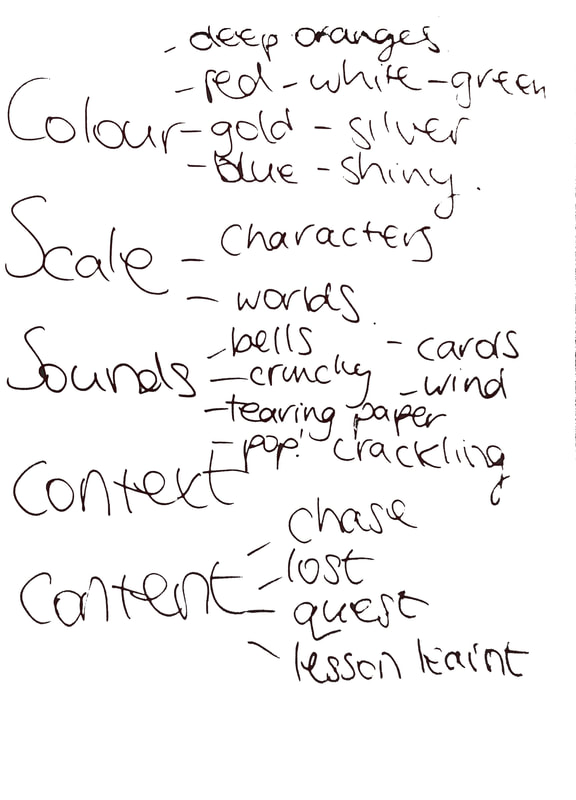
When we were first given this brief we got into groups and discussed what we think of when we hear the word christmas. There were some things that were common between all groups, such as food, presents and various other traditions.  We then moved on to brainstorm about the different styles of animation that we could use. Some of the various styles included Knitted, hand drawn, pixilated and stop motion. As well as some of the aspects we needed to think about (lighting, sound effects, sound and colour). All of which I will take in to consideration when creating my final design).
This helped me because it allowed me to see in writing what similarities there were between everyones christmas’. Therefore it meant that I could draw on these similarities within my storyboards to ensure that the audience could relate to and understand my idea. I then went on to narrow down these brainstorms to a few ideas that I felt would be good to take forward into my storyboards. One of the things that I wanted to do next was to begin putting some ideas down. Initially I just wrote them down without images because this enabled me to get my ideas down quicker. After I had a few Ideas I transferred them onto storyboards.
Today we were visited by designer Jim Hobbs who was able to give us some incite into what works well with projection mapping and what doesn’t. This was very useful because a lot of people on the course, including me, had no previous experience with projection mapping. In this lecture we were shown some examples of some amazing mappings and deconstructed them to work out what made them so good. Below is a list of things that we came up with.
We then also looked at some examples of what doesn’t work. This enabled us to see exactly why the following things wouldn’t translate well to a projection.
The final thing that he touched on was sound, and how important it was that the sound and image work well together and compliment each other. And how when this happens it makes an experience for people, so they will react more positively to it. Below are the examples that he showed us. One of the first things I wanted to research was other projection mappings, I quickly realised that the best mappings used high contrast and didn't have too much going on at any one time. It is also the abstract ones that caught my attention the most. For this reason I think that I might use some abstract imagery within my design.
Whilst doing this research I found an artist called Rebecca Smith. She runs Urban Projections, which showcases various mixed media experiences that she has created both by herself and with collaborators. I find her work engaging to watch. This is a trait I want my projection mapping to have. I want to be able to keep the viewer interested in what is going on. I think by using bright assets on a black background I will be able to catch the attention of the audience.    Another thing that I wanted to look into was how to make a good storyboard. Although I had a rough idea as to what to put into my storyboard I wanted to look into this further.
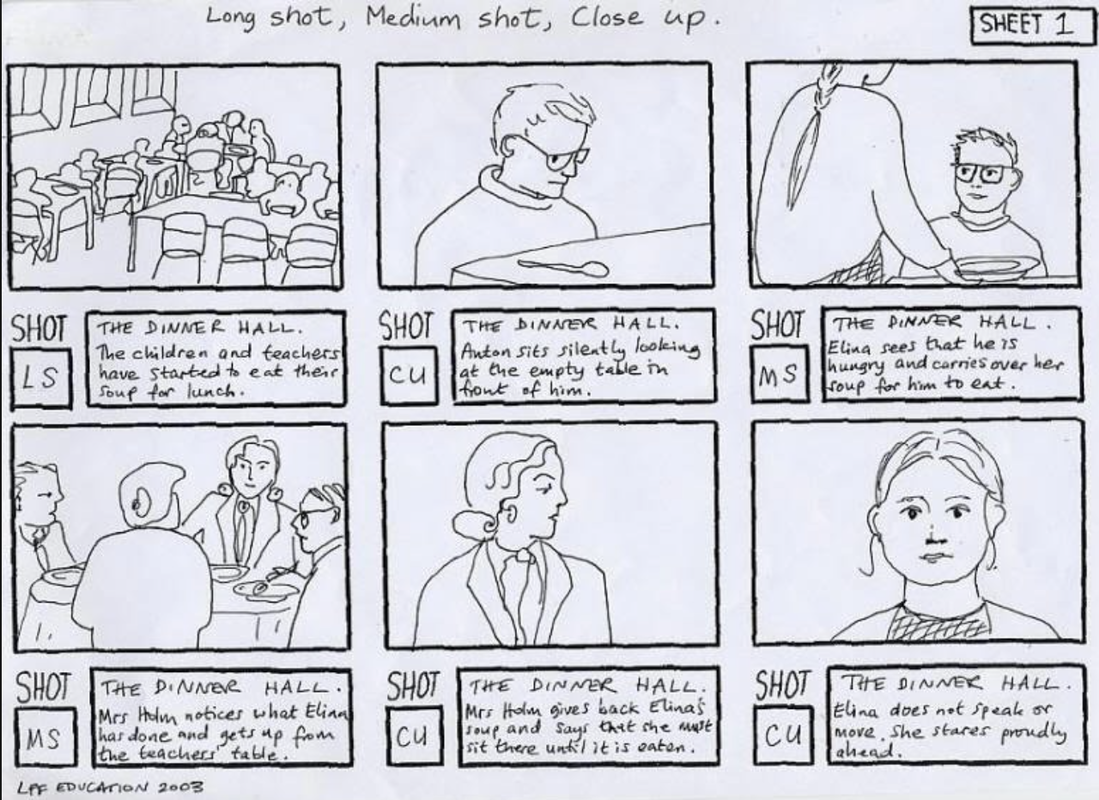
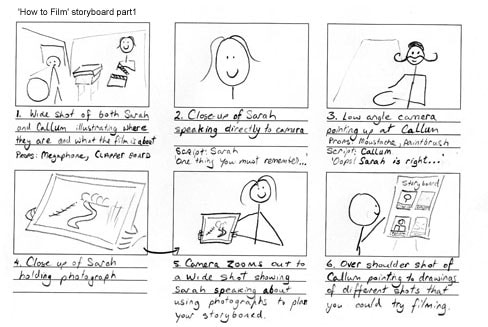
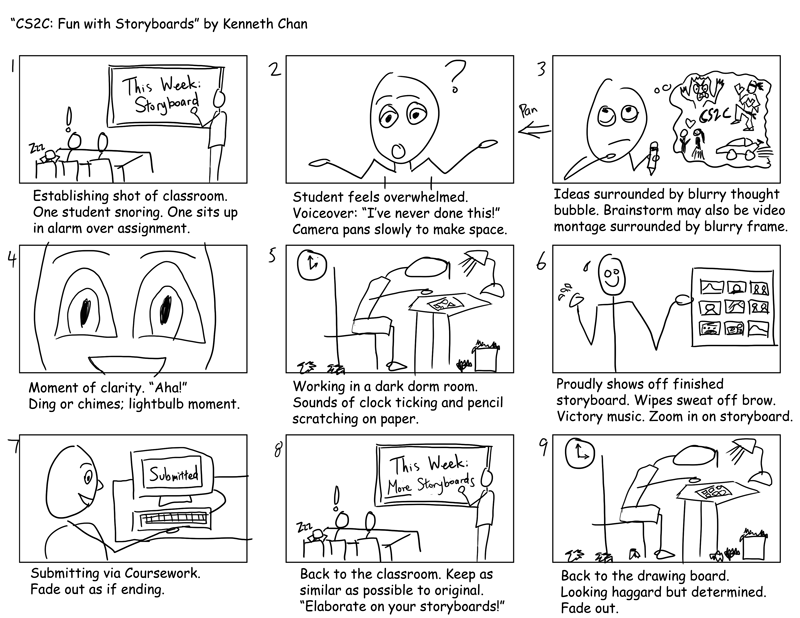
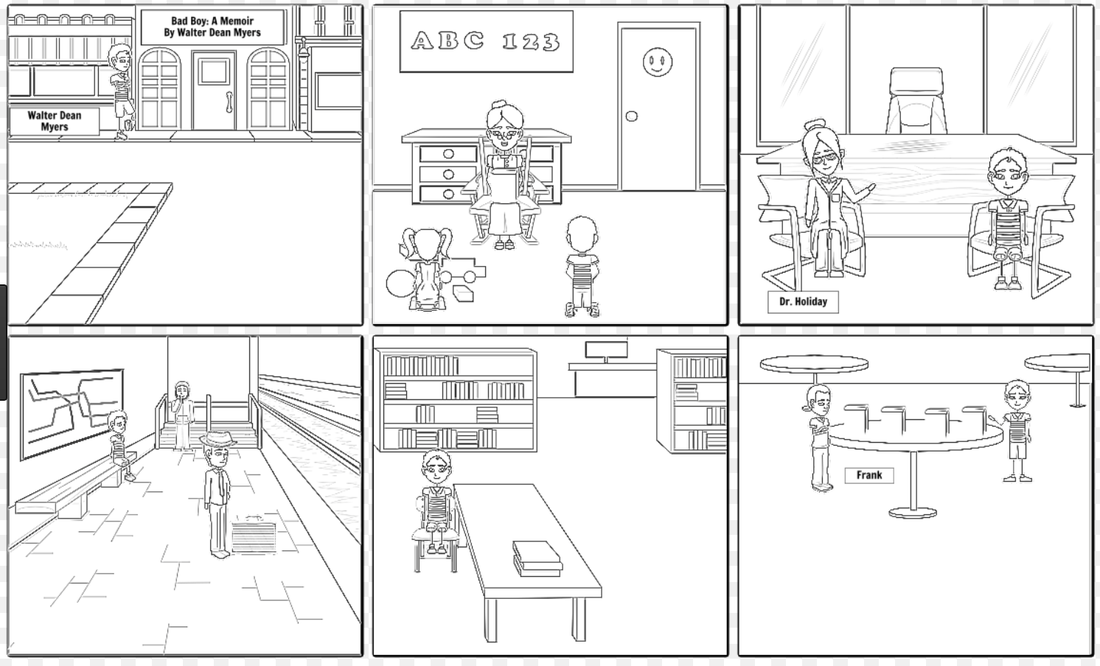
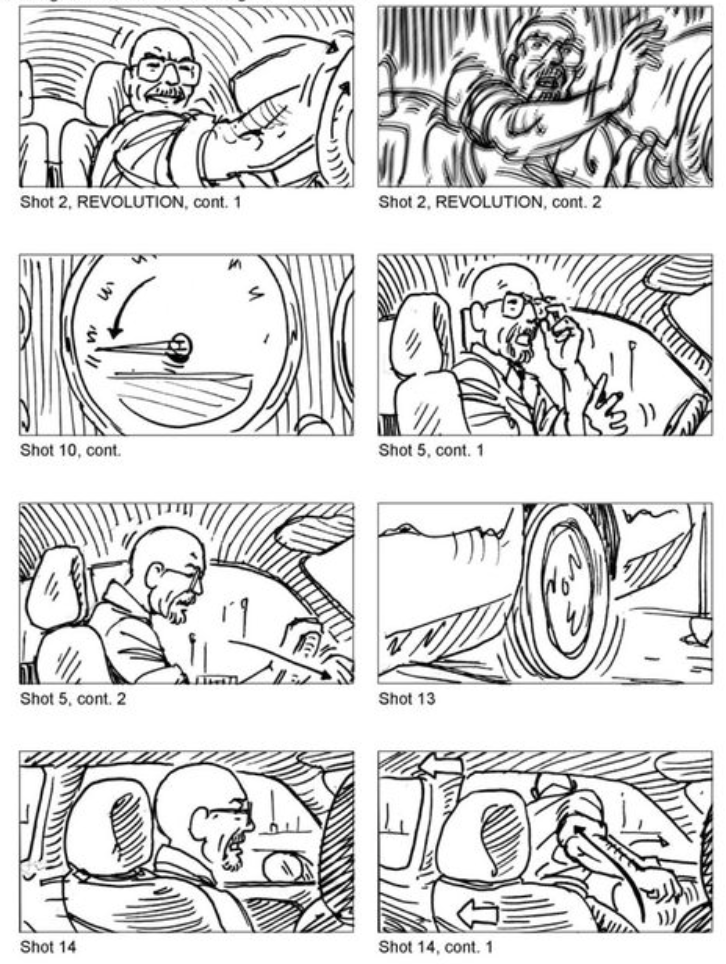
The above examples show some storyboards that I feel work well and others that I feel don't. One of the main things that I took away was that the most comprehensive storyboards have numbered shots, a brief description about what is going on in each scene and make some reference to the sounds / camera angles. The ones I thought didn't work well had little or no explanation of the scenes. Because of this different people may interpret them in different ways which could lead to the same storyboard producing multiple different stories. This is why I feel it is much better to include some information about each scene. One of the other things I picked up on was that the quality of the drawing doesn't have to affect the quality of the storyboard as long as the image is comprehensible and gives the right information about the scene in question.
The theme for this project is The Night Before Christmas. It will be based around the poem by Clement Clark. The first thing that I needed to do was to look at the lyrics.  We have been asked to create a 30 second animation to be projected onto Eastbourne's Town Hall Tower. In this animation we need to depict and adventure or chase, involving three protagonists. Jane (10), Tim (8) and Santa.
|
AuthorWrite something about yourself. No need to be fancy, just an overview. Archives
January 2018
Categories |
 RSS Feed
